our mini session prep is well underway for this season! Locations are selected, calendars are marked, and packages are being finalized. How do you plan to profit from your sessions on top of your booking fee?
How you structure your mini session packages is important, and with this blog, you’ll have the opportunity to learn how to intentionally structure your mini session packages— and online galleries— to ensure you are maximizing your profit from mini sessions this year.
How many digital files do you include in your mini session packages? If you answered All Digitals, we hope this blog post will help you reconsider! One of the best ways to profit from mini sessions is by including a set number of files with your packages and upselling your clients additional digital files from their session with you.
We have partnered with CloudSpot Ambassador and Photography Educator, Ashley Ammons, to review how she structures her family sessions and CloudSpot Galleries for profitability.
Meet Ashley Ammons
Hi, CloudSpot Community! I’m Ashley, and I teach family photographers how to do mini sessions and have candid moments during their sessions! My goal is to have photographers reach their goals and not let fear stop them like I did for so many years. I’m passionate about educating on mini session profitability because they have changed my family photography business for the better! I truly believe that mini sessions don’t have to be overwhelming or a waste of time— they can be one of the most profitable events in your business!
I’m excited to share about how I structure my mini sessions for profitability while also reviewing how I structure my CloudSpot Galleries and Online Storefront to guarantee extra earnings for every gallery sent with little to no management from me as the photographer.
Package Structure
Even though my family mini sessions are photographed in a shorter time frame, I’m able to get many beautiful images. I structure my mini sessions to include a set number of digital files. For the most part, I recommend offering 5-10 included digital files with your mini sessions, but this may vary depending on your market, business structure, and clientele.
You’ll probably photograph a number of beautiful images throughout your time with your clients, and it is important that you are sharing these images with them! Not only are these precious memories for your clients, but these moments could add up to big money for you as the photographer!
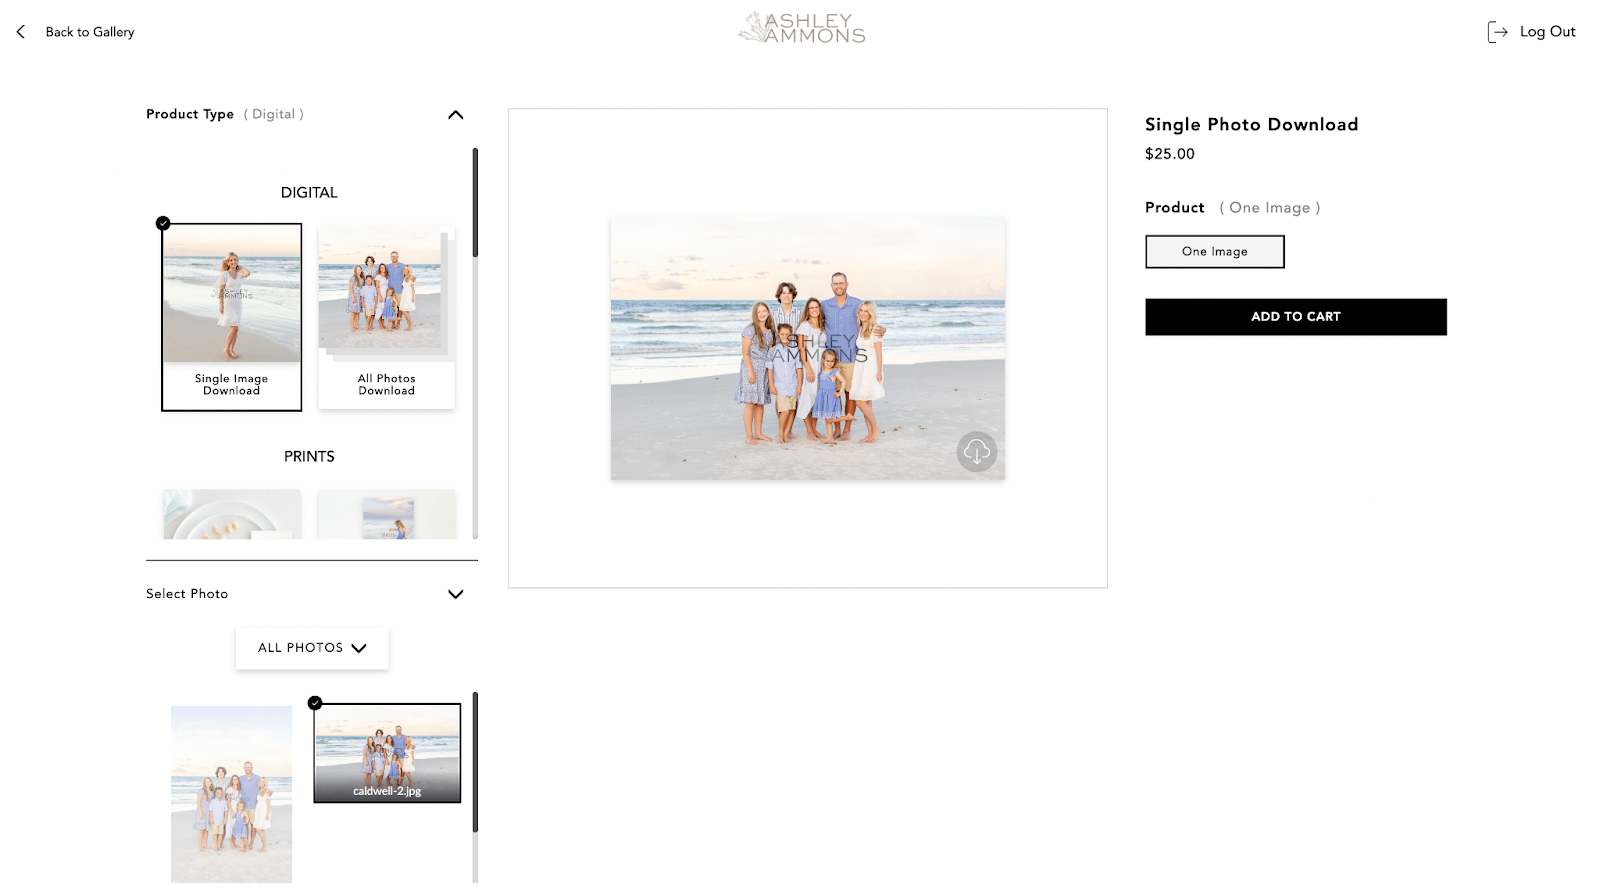
For each mini session I photograph, I typically deliver 25-35 digital images in an online gallery for clients to review, select favorites, download their included images, and then have the option to upgrade and purchase more.
Wondering how to get paid for the additional images your clients will purchase through their online gallery?! I’m so glad you asked!

Storefront Sales Catalog Settings
I love CloudSpot because it allows me to create custom Storefront Sales Catalogs tailored to meet my business and clients’ needs. Before delivering your client mini session galleries, create a custom Storefront Catalog to be attached to all of your mini session galleries.
Here is exactly how I recommend you customize your settings to maximize profit:
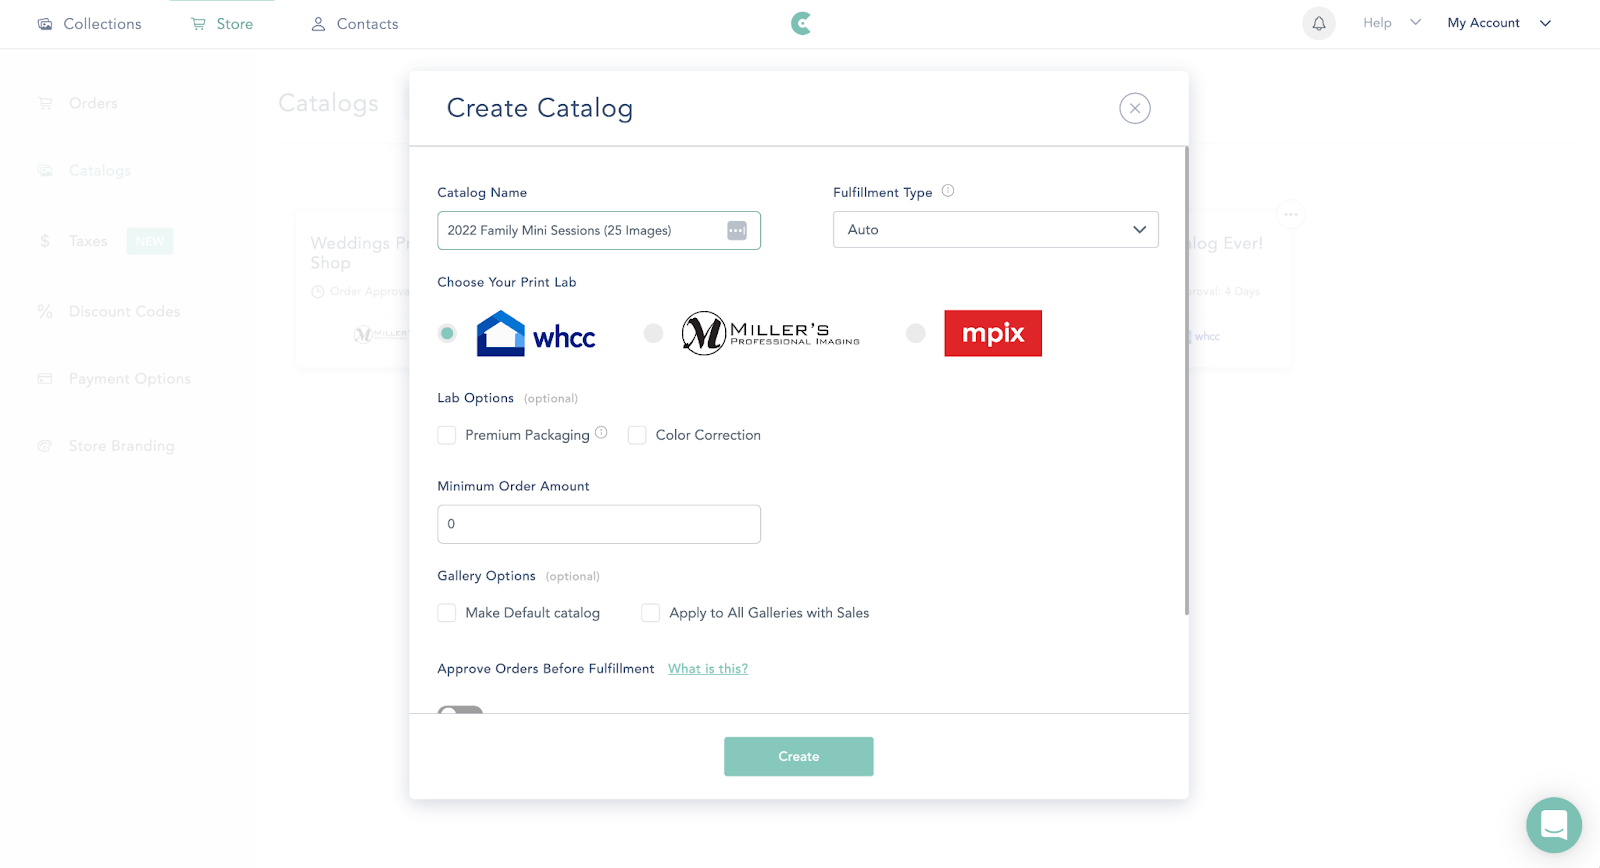
To start creating your Custom Storefront Catalog, tap the Store tab on your CloudSpot Dashboard, click Catalog in the left menu bar, and finally click + Create Catalog. Give your Catalog an intentional name, select your fulfillment lab, update the remainder of the settings to reflect your needs, and then press Create. You’ll notice that you have the option to approve orders before they send to print under this settings page. I recommend enabling this setting to ensure you are able to take a look at client’s print orders to double-check their crops are correct before images send to production.

Once your Catalog is created, pick which prints and products you want to sell and select your markups. From there, it is time to add your Digital Downloads!
Adding and Pricing Digital Images
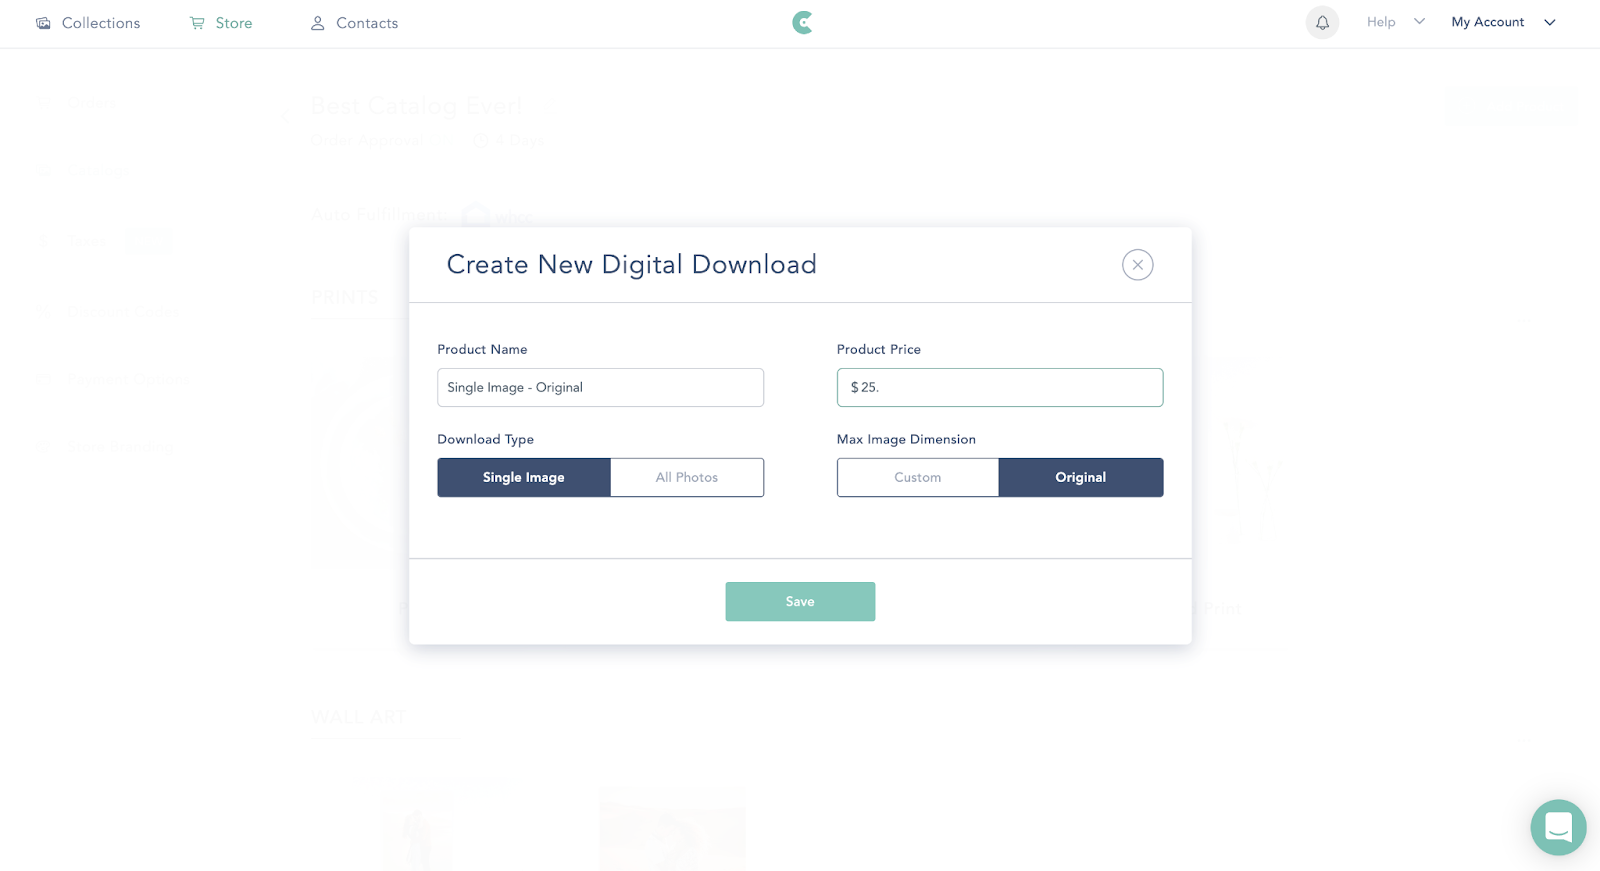
Within your Catalog, tap the + Add Product button and select Digital Product. Start with pricing of a single digital file as this will determine the overall cost for your full digital gallery.

Set the price for a single digital file based on your CODB and profitability needs. For me, this is typically about $25/image, but crunch the numbers on your own to ensure you are pricing files appropriately. Input this value into the Single Image Product Price and save.
To calculate the amount that you will sell all digitals for, we will need to do a little math. After determining the price for one image, multiply this by the number of images you deliver in the gallery— while I include 10 digital images with my mini session packages, I often deliver 25-35 images to my clients to encourage them to purchase more. I usually subtract a little from the total value, giving my clients a Thank You Discount for purchasing their full gallery. From there, you will add this value to your Catalog the same way you added the single image— be sure to select the “All Photos” option.
To see this play out with numbers, say that we are charging $25 for a single image download. For my 25-image galleries, multiply $25 by 25 images. This gives you a total cost of $625 for the full gallery. You are welcome to stop here and use that as your Full Gallery Digital Download cost! I personally offer my clients a discount on their Full Gallery, so I would typically price this at $600.
Pro-tip: if you find you have a number of sessions that fall on either end of your typical delivery spectrum (Example: The A. Family receives 25 images while The B. Family receives 35 images), I recommend creating two different Catalogs with two different pricing options for the full gallery to ensure you are compensated appropriately.
Delivering Free Digital Files with CloudSpot
Now that we have taken care of how much you will be paid for each image, it’s time to set up a discount code to ensure your clients are able to download their included free digital images. To do this easily, create a unique Discount Code for each of your family galleries.
To create a Discount Code in CloudSpot, navigate to the Store Dashboard and select “Discount Codes” in the left navigation bar. Tap the + Add Discount Code button and give your discount code a strategic name. Create or generate the Discount Code, and then toggle the discount to apply to Digital Sales. Multiply your single image cost by the total number of included images in your mini session package, and this is the value that your Discount Code will be valid for.
I recommend setting the limit to one use to prevent multiple users from using the discount code and setting the Minimum Order to the total value of the Coupon Code to ensure your clients can download all of their free digitals at one time. I allow my code to work on Single Digital Files and All Files. From there, press save!
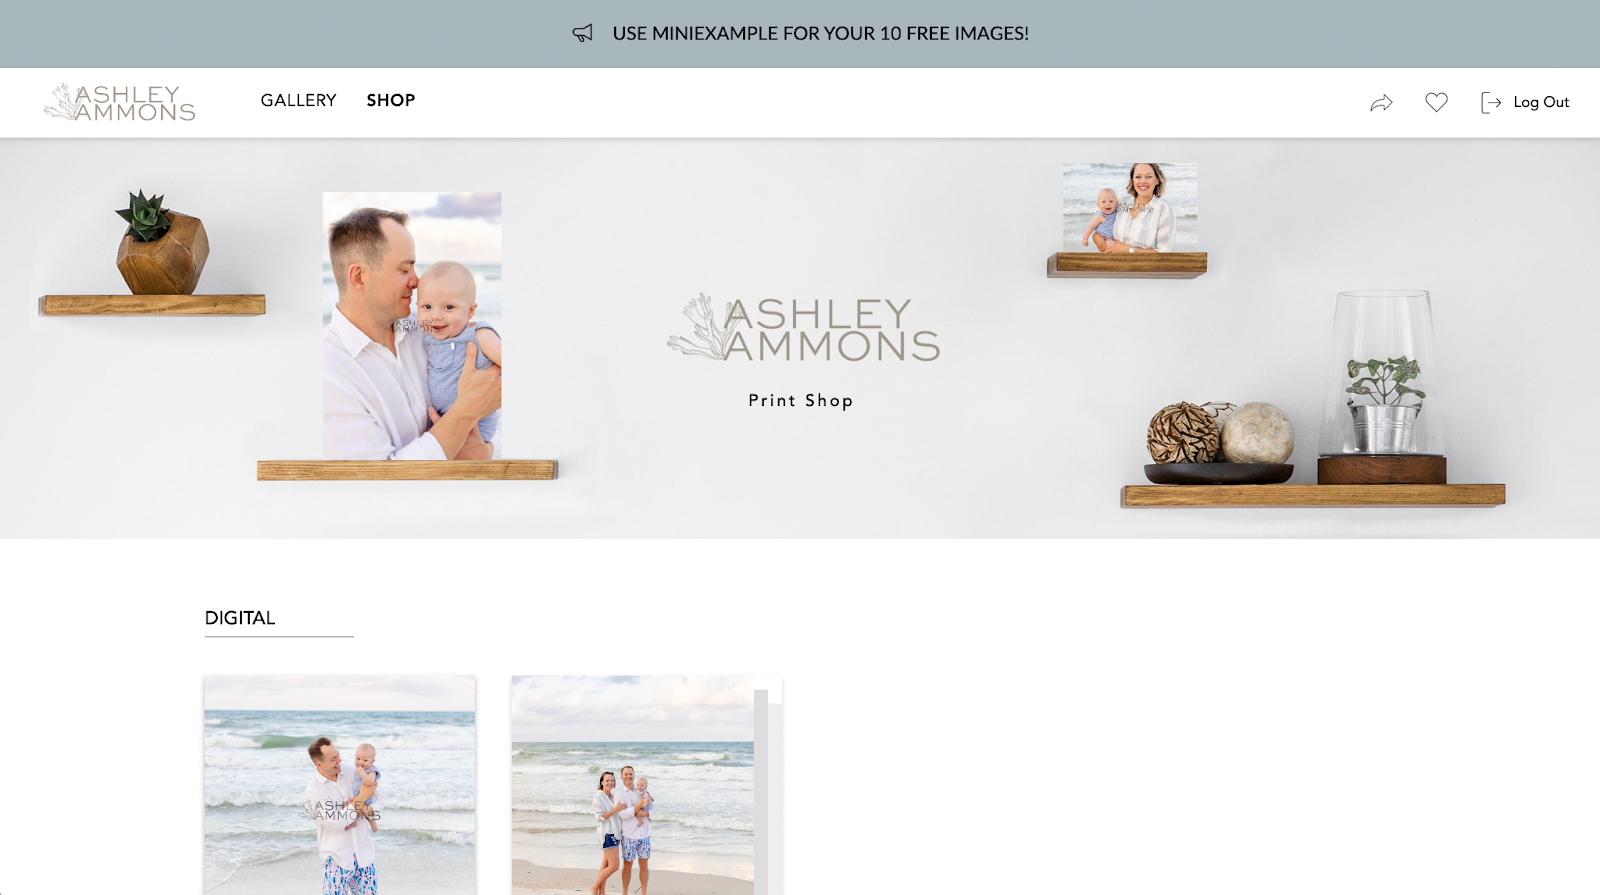
Add this coupon code into all of your family mini session galleries in a sales banner.

Gallery Settings
Your beautiful images are edited and ready to send to your client! Before you do, set up your online gallery to ensure profitability. As you create your first family gallery, start by adjusting the settings to tailor the design of the album to your liking.
From there, go to the Download tab and switch “Enable Downloads” into the off position. Turning these off ensures that clients will not be able to download images for free and will instead be required to purchase downloads through your Storefront.
Remember the Sales Catalog you set up for your online galleries? Tap the Sales tab next and ensure your Sales Catalog is activated under the Sales Catalog dropdown menu. Ensure Discount Codes is toggled to the on position, and consider Limiting Accepted Codes to just the download option created for your client.
To keep your client’s Discount Code easily accessible, I recommend enabling a Sales Banner. Your Sales Banner will display in your primary brand color at the top of your gallery.
Finally, consider adding your watermark to your Gallery images. You can activate this setting under the Access tab after uploading and customizing your Watermark appearance under your Account Settings.
Pro-Tip: Do this setup once and save your settings as a Gallery Preset. Each time you upload a new gallery and are ready to send, simply update the Discount Code under the Sales Tab, and you’ll be good to go! Time-saver!
Want to dive deeper?
I’m so excited that you are having fun learning about profitable family mini sessions! As an educator for family photographers, I have a full course designed to help you focus on booking profitable and successful mini sessions!
We cover everything from planning to marketing, client posing, and post-session workflows! This course is perfect for photographers looking to easily book mini sessions while providing a client experience that leaves families raving. If you are hoping to market to an ideal client who will book again and again and want to multiply your average sales with mini sessions, this course is for you! Click here to get started— I would love to welcome you to the course!
Ready to start upselling your family mini sessions through CloudSpot?! Click here to join for free today!

.png)


.jpg)


.webp)
.webp)
.webp)
.webp)
.webp)


.webp)


.png)


%20(1).avif)


