
.png)


.webp)


.webp)
.webp)
.webp)
.webp)
.webp)


.webp)


f you're setting up CloudSpot Studio for the first time, you're in the right place. This guide walks you through everything, from branding your account to sending your first client project, so you can get organized and start running your photography business like a pro. The best part? You can have it up and running in under an hour.st).
Studio: The 1-Minute Overview (Video)
What Is CloudSpot Studio?
CloudSpot Studio is an all-in-one photography business management tool that handles contracts, invoices, questionnaires, client portals, scheduling, and mini session booking, all included in your CloudSpot plan, with no extra subscription required.
Think of it as your backstage assistant: it takes care of the business side so you can stay focused on what you actually love — being behind the camera.
What Can You Do with CloudSpot Studio?
Before diving into setup, here's a quick look at everything Studio gives you:
- Contracts — Create, send, and collect e-signatures on professional contracts and model releases
- Invoices — Send invoices, accept payments, and automate reminders so you're not chasing anyone down
- Questionnaires — Gather client details, shot preferences, and event info before every session
- Client Portal — Give every client one branded hub where they can sign, pay, and answer questions
- Scheduling — Share your calendar and let clients book sessions without the back-and-forth
- Mini Session Booking — Set up time slots, manage multiple bookings at once, and fill your mini session calendar faster
All of this is connected to your client galleries and print store, so the entire client experience lives in one place.
Step 1: Make It Yours
CloudSpot has always been about creating a beautiful client experience, so if you're eager to choose your colors, upload a header image, and dial in your branding…start here!
Head over to Studio Settings to personalize everything. Your logo (already uploaded to CloudSpot) will automatically appear across all your Studio documents and emails. While you're in settings, go ahead and save your signature and connect your payment method too — it'll save you a step later.
Step 2: Create Your Templates
Templates are the backbone of how Studio works. They let you build a document once and reuse it with every client. No need to start from scratch each time.
New to this and not sure what to even send? Start with a template anyway. Your future self will thank you!
A few examples to get you thinking:
- Wedding photographers: a standard contract, a second shooter agreement, and a payment schedule invoice
- Newborn photographers: a model release and a session prep questionnaire
- Family photographers: package templates, questionnaire, contract
Head to the Templates section of Studio, scroll to the document type you want to start with, and click "+Create New Template." Use Smart Fields to insert placeholders that auto-fill client names, dates, addresses, etc. Smart Fields makes every template feel personalized without any extra work on your end.
P.S. You can absolutely send one-off contracts, invoices, and questionnaires to individual clients! However, if you plan to send the same document more than once, templates are the way to go to speed up your process.
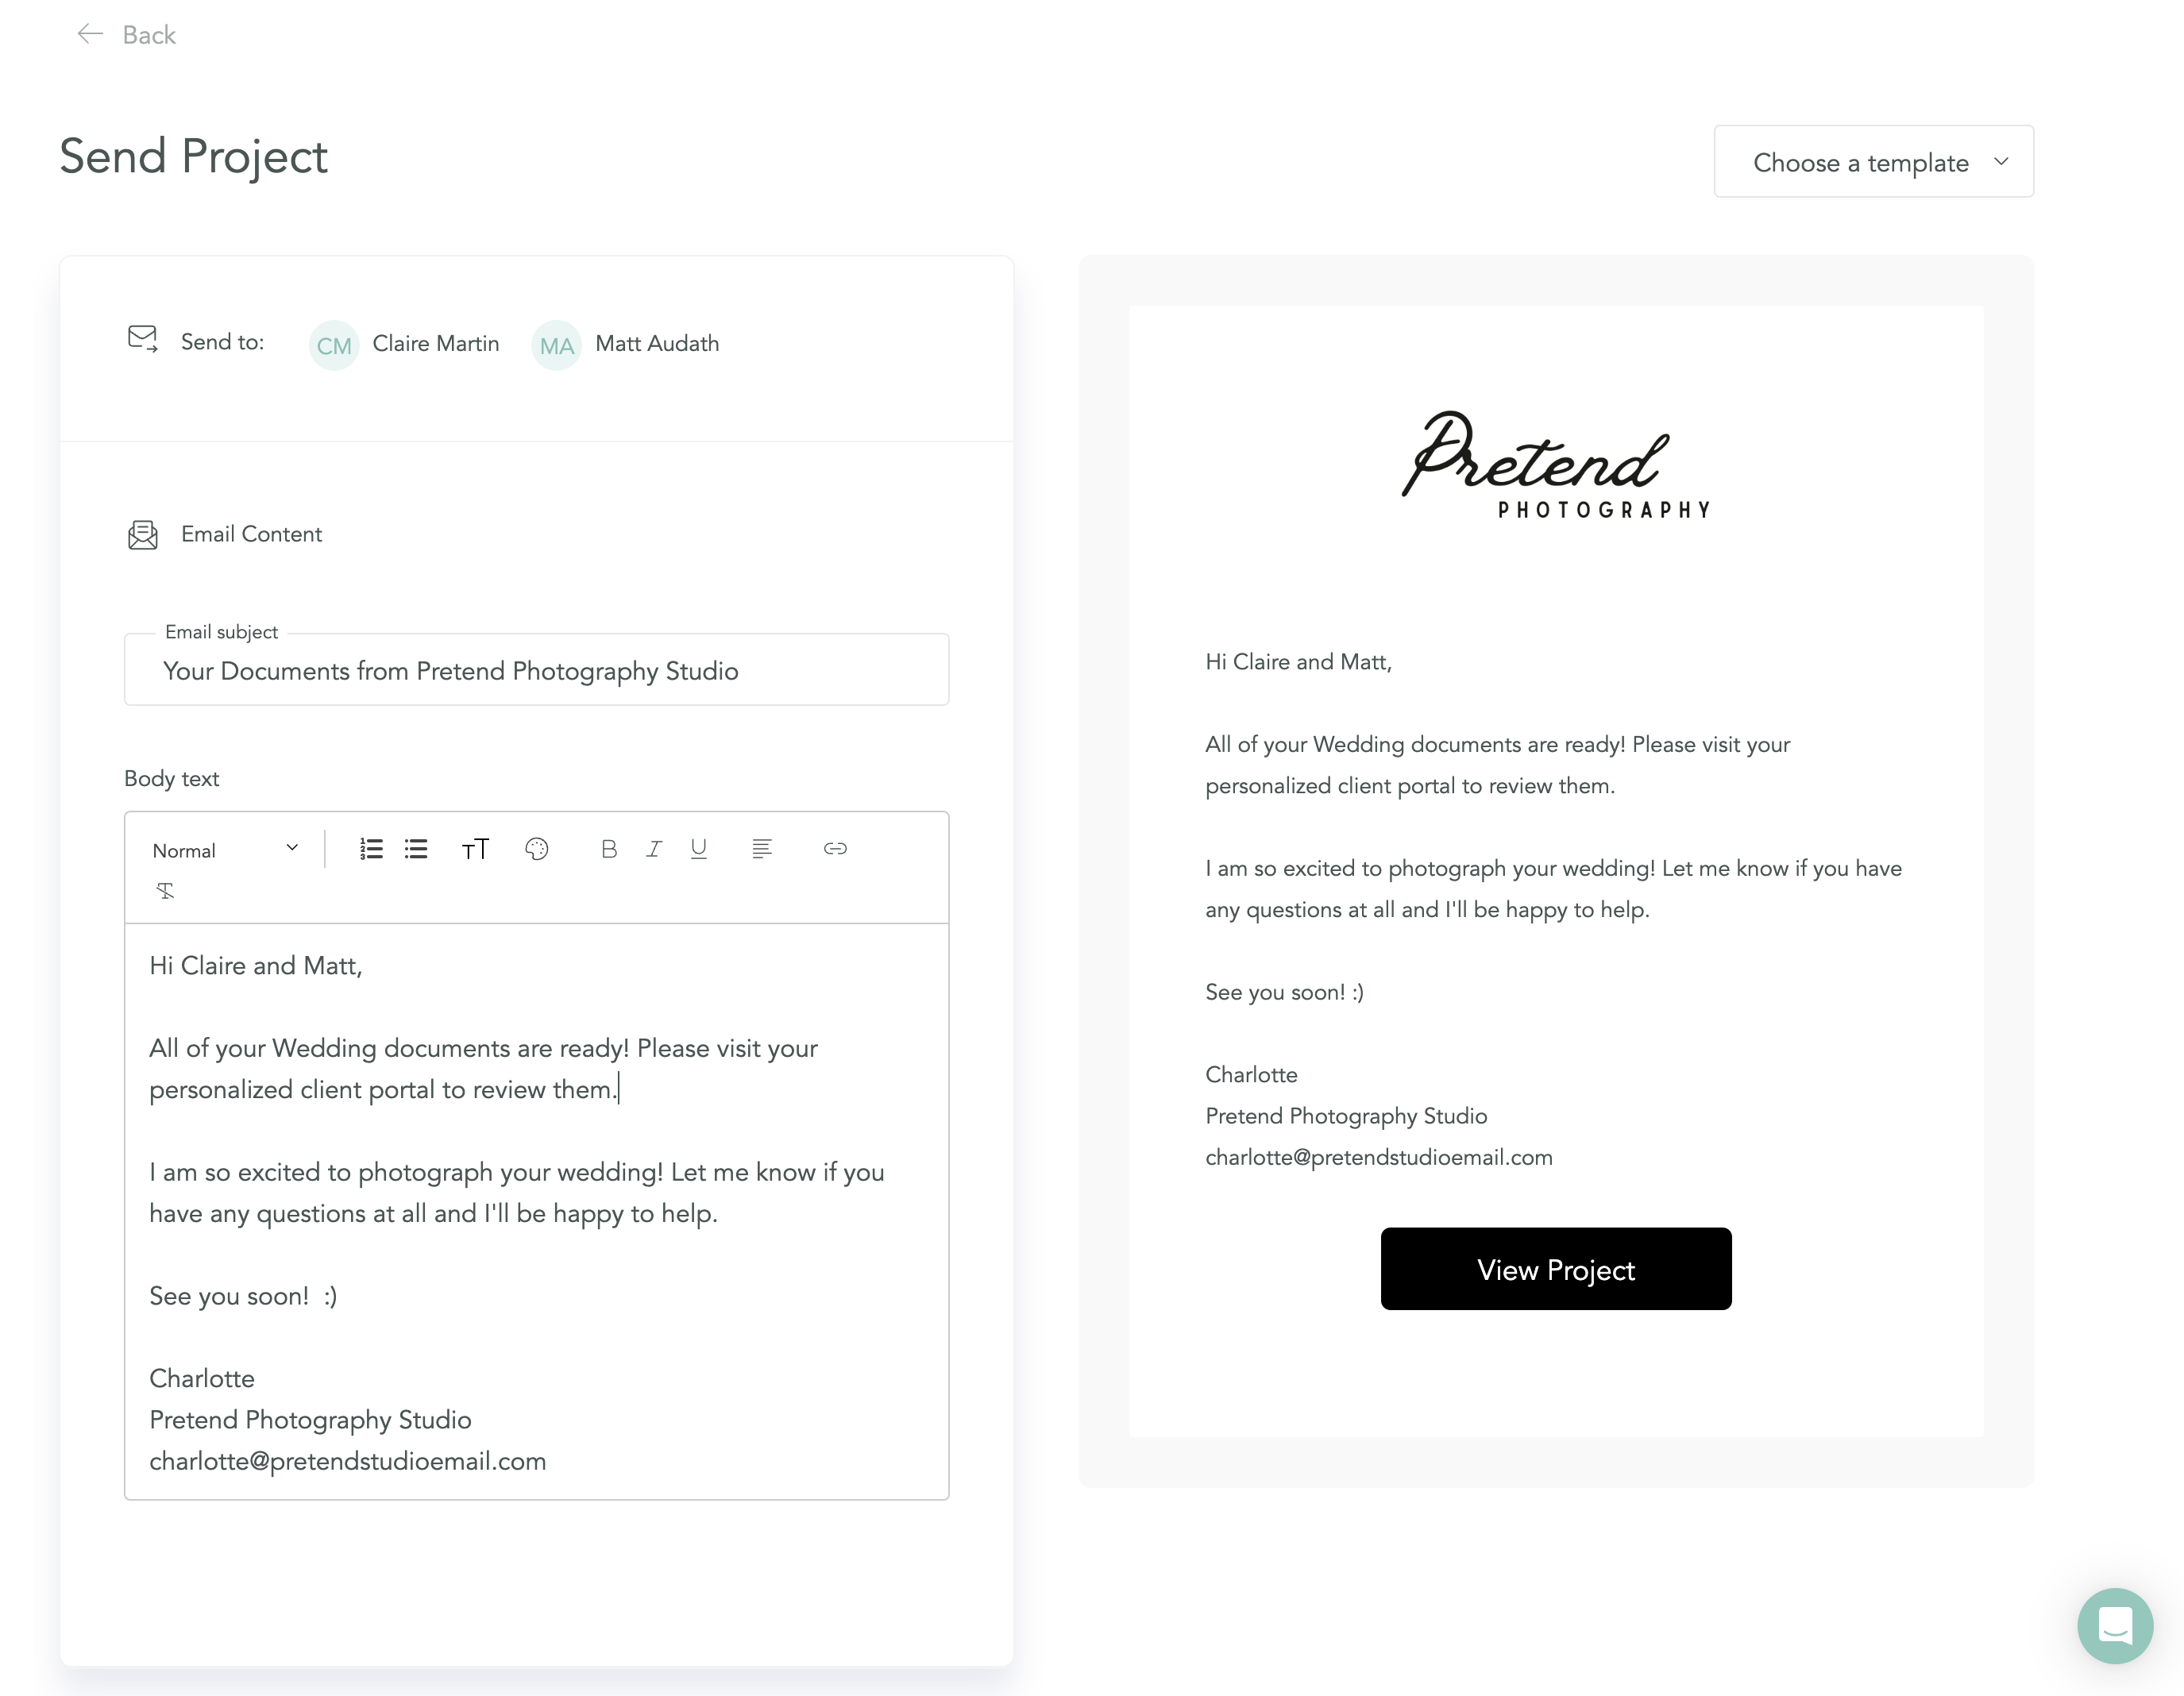
Step 3: Create a Project and Send It
Once your templates are ready, Projects are where everything comes together. Think of a Project as a client folder (when physical folders were a thing). It holds every document for a specific booking (contract, invoice, questionnaire) and presents them to your client in one clean, branded portal.
Here's how it works:
- Create a new Project for the booking
- Click "Add Contract" (or Invoice, or Questionnaire) and choose "start with a template"
- Customize anything specific to that client or event
- Hit "Send Project" — your client gets one email with a link to their personal Client Portal
From there, they can sign, pay, and answer your questions all in one place. It looks polished, it's easy for them to use, and you'll have everything organized on your end without digging through email threads.
Step 4: Set Up Scheduling and Mini Sessions
This is one of the biggest additions to CloudSpot Studio since the original launch, and it's a game-changer if you're tired of the booking back-and-forth.
Scheduling lets you share a booking link so clients can pick a time directly from your calendar. No more "does Tuesday work for you?" email chains or Instagram DMs.
Mini Session Booking takes it a step further. You can create a block of time slots, set your session length and pricing, and share one link that lets multiple clients book their individual spots. It's the easiest way to fill a mini session day without managing a spreadsheet or inbox full of "is 5pm still available?" messages.
To get started, head to the Scheduling section inside CloudSpot Studio and set up your availability.
How Does CloudSpot Studio Help Photographers Run Their Business?
If you're wondering whether Studio is worth setting up, here's the short answer: yes, especially once you're managing more than a handful of clients at a time. Having your contracts, payments, questionnaires, and booking all in one system means less time on admin and more consistency in how your business runs. And since it's already included in your CloudSpot plan, there's no reason not to use it.
Need a deeper walkthrough? The Studio Quick-Start Guide in the Help Center covers every click in detail.
Ready to Get Started?
Setting up CloudSpot Studio is one of the best things you can do for your photography business, and it takes less time than you'd think. From contracts to mini session booking, everything you need to run a professional, organized business is already waiting for you.
Start your free CloudSpot account →
Already a CloudSpot user? Log in and head to Studio to get set up today.
Frequently Asked Questions About CloudSpot Studio
What is CloudSpot Studio?
CloudSpot Studio is a photography business management tool built into the CloudSpot platform. It includes contracts, invoices, questionnaires, a client portal, scheduling, and mini session booking — all in one place, with no additional subscription required.
Is CloudSpot Studio included in my plan?
Yes. CloudSpot Studio is included in all paid CloudSpot plans at no extra cost. You don't need to add a separate subscription to access contracts, invoices, questionnaires, or scheduling features.
How do I set up mini session booking in CloudSpot Studio?
You can set up mini session booking directly inside CloudSpot Studio by creating a block of available time slots, setting your session length and price, and sharing your booking link. Clients can then choose and book their individual spots without any back-and-forth.
What is a Client Portal in CloudSpot Studio?
A Client Portal is a branded, private page that CloudSpot generates for each of your clients. It's where they can sign contracts, pay invoices, and complete questionnaires — all in one place, from any device.
Can I use CloudSpot Studio if I already use CloudSpot for galleries?
Absolutely. Studio is built into the same platform, so your client management and gallery delivery are connected. Clients can access their portal, documents, and delivered photos all through CloudSpot.

.png)


.webp)
%20(1).avif)


